Home

Preventing Bathroom Leaks: A Step-by-Step Guide to Waterproofing Shower Walls

Welcome to our comprehensive guide on preventing bathroom leaks through effective waterproofing of shower walls. In any home, the bathroom is a sanctuary of cleanliness and comfort, but hidden behind the serene façade of shiny tiles and gleaming fixtures lies a potential problem – water damage. Leaks and moisture infiltration can lead to various issues, from unsightly mould growth to serious structural damage. Unfortunately, these problems are often only noticed when it’s too late, leading to costly repairs and renovations.

The good news is that most of these issues can be prevented with proper waterproofing techniques. This blog post is crafted to give you the knowledge and steps necessary to ensure your shower walls are watertight and secure. Whether you’re building a new bathroom, renovating an old one, or just looking to fortify your current space, understanding the essentials of waterproofing is key to maintaining the health and longevity of your bathroom.

We’ll start by explaining the basics of shower wall waterproofing, helping you grasp why it’s so crucial. Next, we’ll guide you through preparing your walls for the process, choosing the right waterproofing materials and methods, and finally, the application process itself. With this step-by-step guide, you’ll be well on your way to a leak-free bathroom, giving you peace of mind and preserving the integrity of your home. Let’s dive in and learn how to keep your bathroom dry and damage-free!

Bathroom Leaks

Understanding the Basics of Shower Wall Waterproofing

Waterproofing is an essential aspect of bathroom maintenance that often goes unnoticed until it’s too late. It involves creating a barrier on walls and floors to prevent water from seeping into the structure of the building. This is particularly crucial for shower walls, as they are constantly exposed to moisture. Without proper waterproofing, water can penetrate through the walls, leading to mould growth, tile damage, and even affecting the structural integrity of the building.

There are several methods and materials available for waterproofing shower walls. The most common types include liquid waterproofing membranes, sheet membranes, and waterproofing paint. Liquid membranes are applied with a brush or roller, forming a rubbery coating on drying. On the other hand, sheet membranes are large pieces of waterproof material that adhere to the surface. Like regular wall paint, waterproofing paint is a simple application but usually less durable than the other methods.

The signs of a poorly waterproofed bathroom are often evident. If you notice peeling paint, mould growth, damp spots on walls, or a musty smell, water is likely infiltrating the walls. You shouldn’t ignore these signs as they can lead to more significant damage over time.

Preparing for Waterproofing

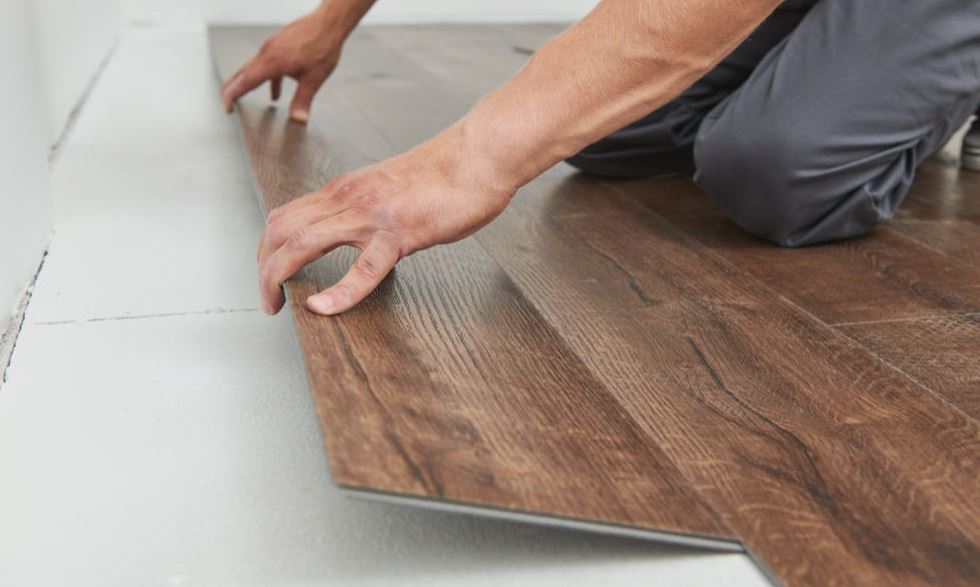
Before beginning the waterproofing process, proper preparation of the shower walls is crucial. Start by thoroughly cleaning and drying the surface. This ensures that the waterproofing material adheres correctly. Next, inspect the walls for any cracks or damage. These imperfections must be repaired, as even the smallest crack can compromise the waterproofing. Old caulk or sealant should be removed as well, as new waterproofing materials may not bond well to these substances.

The tools and materials needed for waterproofing include a high-quality brush or roller for application, a caulking gun for sealant, a cleaner to prepare the surface, and the waterproofing material of your choice. Also, consider safety equipment such as gloves and goggles, as some waterproofing substances can be harmful if they come into contact with skin or eyes.

Choosing the Right Waterproofing Method and Materials

When selecting waterproofing products, it’s important to consider the specific needs of your bathroom. Liquid waterproofing membranes are popular due to their ease of application and effectiveness. They suit many surfaces but require careful application to ensure an even coat. Sheet membranes offer a robust barrier and are excellent for larger areas, though they can be more challenging to install. Waterproofing paint, while user-friendly, might require frequent reapplications and is better suited for less intensive moisture exposure.

Each method has its advantages and disadvantages. Liquid membranes are versatile and strong but can be messy, requiring a certain skill level to apply evenly. Sheet membranes provide a reliable barrier but can be difficult to work with in smaller or irregularly shaped spaces. Waterproofing paint is easy to apply but may not offer the same level of protection as the other methods.

When choosing a method, consider factors like the layout of your bathroom, your walls’ existing materials, and your DIY skill level. A combination of methods can also be used for optimal protection.

The Waterproofing Process

Once you have chosen your waterproofing method, follow these detailed steps for application:

  1. Surface Preparation: Ensure the wall is clean, dry, and free of any damage. Apply a primer if recommended by the waterproofing product manufacturer.
  2. Application: Use a brush or roller to apply an even coat over the entire surface for liquid membranes. Pay special attention to corners and edges where water infiltration is most likely. If using sheet membranes, cut the material to size and adhere it to the wall per the manufacturer’s instructions. For waterproofing paint, apply it like regular paint, ensuring even coverage.
  3. Drying: Allow the waterproofing to dry completely. Depending on the product and the environmental conditions, this may take anywhere from a few hours to a day.
  4. Safety and Precision: Always follow the manufacturer’s guidelines for application. Use safety gear to ensure the room is well-ventilated to avoid inhaling fumes.
  5. Final Inspection: Once dry, inspect the waterproofing to ensure there are no gaps or missed spots. A second coat may be necessary for some products.

Remember, the key to effective waterproofing is thoroughness and attention to detail. By following these steps carefully, you can achieve a waterproof barrier that will protect your bathroom from moisture damage for years to come.

Drying and Curing

After applying the waterproofing material, it’s crucial to let it dry and cure properly. This step is often overlooked but is essential for the effectiveness of the waterproofing. Drying refers to the evaporation of any solvents or water in the waterproofing material, while curing is the chemical process where the material reaches its full strength and durability.

Bathroom Leaks

The time required for drying and curing varies depending on the type of waterproofing material used, the thickness of the application, and environmental conditions such as temperature and humidity. Generally, a waterproofing membrane might take 24 to 72 hours to dry completely. During this period, keeping the area dry and avoiding any water exposure is important. Always refer to the manufacturer’s instructions for specific drying and curing times.

Maintaining optimal conditions for drying and curing is vital. A well-ventilated bathroom will help quicker drying, but avoid direct airflow onto the treated surface as it can cause uneven drying. Keep the temperature steady; extreme temperatures can affect the drying process and the outcome of the waterproofing.

Finishing Touches and Maintenance

Once the waterproofing is dry and cured, tiles or other wall treatments can be applied. Ensure that the adhesive used for tiling is compatible with the waterproofing material. It’s also important to maintain the integrity of the waterproof layer during this process; be careful not to puncture or tear the membrane.

Regular maintenance is key to sustaining the effectiveness of the waterproofing. Periodically check for any signs of wear and tear, especially in high-use areas. Reseal any gaps or cracks immediately to prevent water penetration. In bathrooms with high humidity, using a dehumidifier or ensuring adequate ventilation to reduce moisture buildup is also advisable.

Professional Help vs. DIY

While many waterproofing tasks can be accomplished as DIY projects, there are instances when it’s best to seek professional help like pro waterproofing Adelaide. If you are not confident in your DIY skills, especially in mixing or applying the materials properly, hiring a professional is advisable. Also, if the bathroom has a history of serious water damage, professional assessment and intervention might be necessary to address underlying issues.

Signs that indicate the need for professional intervention include persistent mould or mildew despite waterproofing attempts, structural damage such as warping or bulging walls, and recurrent leaks. Professionals can also provide warranties for their work, offering peace of mind that the waterproofing will last.

Properly waterproofing shower walls is crucial in maintaining a healthy and damage-free bathroom. It not only prevents mould and structural damage but also preserves the aesthetic appeal of your bathroom. You can ensure a watertight bathroom by understanding the different waterproofing methods, preparing the surface correctly, choosing the right materials, and applying them with precision.

Whether you choose to DIY or hire a professional, the key is not to underestimate this task’s importance. Taking the necessary steps to waterproof your shower walls will protect your bathroom from water damage, saving you time and money in the long run. Remember, a little effort today can prevent significant problems tomorrow. So, gear up and start waterproofing – your bathroom will thank you!

Carpentry and Flooring Maintenance: Keeping Your Interior Beautiful

This blog post is dedicated to helping you understand the crucial role of well-maintained carpentry and flooring in the overall aesthetic and longevity of your home’s interior. Whether you’re a seasoned DIY enthusiast or new to home maintenance, this post will provide valuable insights and practical tips for preserving the beauty and integrity of your woodwork and floors.

From selecting the right materials to understanding the nuances of different types of flooring and carpentry, we will delve into the various aspects of maintenance that are essential for any homeowner. We’ll cover basic cleaning techniques, tackle common problems, and even discuss when to call in the professionals. Additionally, we’ll touch upon the importance of sustainable practices in maintenance, ensuring that your choices enhance your home’s beauty and contribute positively to the environment.

So, whether you’re looking to spruce up your living space or maintain its current charm, join us as we explore the world of carpentry and flooring maintenance and discover how to keep your interior looking its best for years.

Carpentry and Flooring

Understanding Different Types of Flooring Materials

Overview of Common Carpentry Materials

  1. Hardwood: Used for its natural beauty and durability, hardwood is a popular choice for furniture, cabinetry, and trim. Its grains and colours vary significantly, offering a wide range of aesthetic options.
  2. Medium-Density Fiberboard (MDF): MDF is an engineered wood product, known for its smooth finish and uniformity. It’s often used for painted surfaces and intricate designs, as it is easy to shape and has no grain.
  3. Plywood: Composed of layers of wood veneers, plywood is valued for its strength and versatility. It’s a common choice for structural elements, including shelving and panelling.

Each of these materials has its own set of advantages. Hardwood, for instance, is renowned for its longevity and ability to be refinished multiple times. MDF, being more affordable, is ideal for budget-conscious projects where aesthetics are a priority. Plywood balances durability and cost, making it versatile for various carpentry projects.

Discussion of Various Flooring Types

  1. Hardwood Flooring: A timeless choice, hardwood flooring adds warmth and elegance to any room. It comes in various species, each with unique grain patterns and colours.
  2. Laminate Flooring: Laminate provides the look of hardwood at a more affordable price. It’s made of composite wood pressed at high temperatures and covered with a photographic layer.
  3. Tile Flooring: Tiles are durable and water-resistant, making them ideal for bathrooms and kitchens. They come in a variety of materials, including ceramic, porcelain, and stone.
  4. Carpet: Offering warmth and comfort, carpet is popular for bedrooms and living areas. It provides sound insulation and comes in countless colours and textures.

Each flooring type has its pros and cons. Hardwood, for instance, is long-lasting and can increase your home’s value but requires regular maintenance and can be susceptible to moisture damage. Laminate is more durable and less prone to scratches but can’t be refinished like hardwood. Tile is extremely durable and water-resistant but can be cold underfoot and slippery when wet. Carpet is comfortable and sound-dampening but can trap allergens and requires regular cleaning.

Basic Maintenance Tips

Maintaining your carpentry involves regular cleaning and inspections to ensure its longevity. Here are some basic tips:

  1. Cleaning and Dusting Techniques: Regular dusting with a soft, dry cloth is essential. Use a damp cloth with mild detergent for deeper cleaning, but avoid soaking the wood.
  2. Protecting Wood from Moisture and Temperature Changes: Use coasters under glasses and hot pads under hot dishes to prevent moisture damage. Avoid placing wooden furniture near heat sources or in direct sunlight to prevent warping.
  3. Regular Inspections and Minor Repairs: Periodically check for signs of wear, such as loose joints or chipped paint. Tighten screws and fix minor damages promptly to prevent further deterioration.

Flooring Maintenance Strategies

Flooring requires different maintenance strategies based on its type:

  1. Hardwood Flooring: Regular sweeping and occasional mopping with a damp mop are essential. Immediately wipe spills to prevent water damage. Use furniture pads to avoid scratches.
  2. Laminate Flooring: Sweep regularly and clean spills promptly. Avoid excessive water when mopping, as it can seep into the seams and damage the laminate.
  3. Tile Flooring: Regular sweeping and mopping are key. Use a specialised cleaner to prevent discolouration and mould growth for grout lines.
  4. Carpet: Vacuum regularly to remove dirt and allergens. Treat stains promptly and consider professional cleaning annually for deep cleaning.

Addressing common issues like scratches, dents, and stains involves using the right products and techniques for each flooring type. Hardwood might need sanding and refinishing, while laminate may require replacement of damaged planks.

DIY Versus Professional Maintenance

While DIY maintenance can be effective for regular upkeep and minor issues, there are times when professional expertise is required:

  1. When to Handle Maintenance and Repairs Yourself: Simple tasks like cleaning, minor adjustments, and basic repairs can be managed by most homeowners.
  2. Situations Requiring Professional Expertise: Professionals should handle complex issues like structural repairs, refinishing floors, or installing new flooring.
  3. Choosing a Reliable Professional: Look for licensed, insured professionals with good reviews and references. Ensure they have experience with your specific carpentry and flooring types. A good example is BBI carpentry services.

The Role of Carpentry and Flooring in Interior Aesthetics

Carpentry and flooring are more than just functional aspects of a home; they play a pivotal role in defining its aesthetic character. Well-maintained carpentry and flooring not only enhance the overall beauty of a space but also contribute to a cohesive interior design theme.

  • Enhancing Beauty with Maintenance: Regularly maintained carpentry and flooring retain their colour, texture, and integrity, adding to the elegance of your space. For example, polished hardwood floors can bring a luxurious and warm feel, while well-kept cabinetry adds to the sophistication of your kitchen or living room.
  • Impact of Material Choice on Design Themes: The materials you choose for carpentry and flooring significantly influence your home’s design theme. Rustic wooden beams can complement a country-style home, while sleek, laminated surfaces might suit a more modern aesthetic. The key is to select materials that align with your desired theme and maintain them to preserve their visual appeal.

Advanced Care Techniques

As carpentry and flooring age, they might require more than basic maintenance. Here are some advanced care techniques:

  • Refinishing Floors: Over time, hardwood floors can become dull or damaged. Refinishing involves sanding the surface to remove scratches and then applying a new finish coat, restoring its original beauty.
  • Restoring Antique Woodwork: Antique woodwork requires special care. Use gentle cleaners and avoid harsh chemicals. Sometimes, professional restoration might be necessary to preserve the integrity and historical value of the piece.
  • Recommended Tools and Products: Invest in high-quality tools and products for advanced care, such as fine-grit sandpaper, wood stains, and sealants. These products can make a significant difference in the outcome of your maintenance efforts.
Carpentry and Flooring

Sustainability and Eco-Friendly Practices

Maintaining your carpentry and flooring sustainably not only benefits the environment but can also improve the health and safety of your home.

  • Eco-Friendly Maintenance Tips: Use natural, non-toxic cleaners for routine maintenance. A simple solution of vinegar and water for hardwood floors can be effective and environmentally friendly.
  • Sustainable Material Choices: Consider materials like bamboo or cork for flooring, as they are renewable and have a lower environmental impact. For carpentry, look for wood from sustainably managed forests or recycled materials.
  • Sustainable Practices: Adopt practices like reusing old wood, choosing local materials to reduce transportation emissions, and properly disposing of waste.

In this guide, we’ve explored the various aspects of maintaining carpentry and flooring, emphasising the importance of these elements in your home’s aesthetics. From understanding different materials to adopting advanced care techniques and sustainable practices, we’ve covered a comprehensive range of topics to help you keep your interior beautiful.

We encourage you to implement these tips and strategies in your routine maintenance. Regular care not only preserves the beauty and functionality of your space but also contributes to a healthier and more sustainable living environment.

Remember, the beauty of your home’s interior lies in the details. Regularly maintaining your carpentry and flooring is not just a chore, but a way to express care and appreciation for your living space. Investing time and effort in these areas ensures that your home remains a beautiful and welcoming haven for years to come.

Engineered Wood: The Best of Both Worlds?

Choosing the right flooring for your home can be a daunting task. With a myriad of options available—each with its advantages and disadvantages—homeowners often find themselves torn between traditional choices like hardwood and tile. But what if you could get the best of both worlds: the warmth and elegance of wood and the durability often associated with tile? 

Enter engineered wood flooring—a versatile, cost-effective, and aesthetically pleasing alternative that offers a compelling blend of benefits from both hardwood and tile. In this blog post, we’ll delve deep into engineered wood flooring, exploring its advantages and drawbacks, to help you decide if it’s the right choice for your home.

Engineered Wood vs tiles

What is Engineered Wood Flooring?

Engineered wood flooring is a composite product made up of several layers. The top layer is a veneer of real hardwood, providing solid wood’s aesthetic and tactile benefits. Underneath this veneer are multiple layers of plywood, high-density fiberboard, or a similar engineered wood product. These layers are arranged in opposing directions to give the flooring added stability, particularly against moisture and temperature changes.

In terms of appearance, engineered wood can be virtually indistinguishable from traditional hardwood. It comes in various species, shades, and finishes, making it highly versatile in matching any interior design. The difference lies primarily in its structure, offering a more stable composition than hardwood’s natural tendency to expand or contract under varying environmental conditions. Visit ikahousing.com.au to learn more.

Benefits of Engineered Wood Flooring

Versatility

One of the standout benefits of engineered wood is its versatility. Unlike traditional hardwood, which can be sensitive to humidity and temperature changes, engineered wood suits various climates. You can safely install it in basements, over concrete slabs, and even in some high-humidity areas where hardwood is not advisable. This makes it a particularly good choice for those living in climates that experience significant seasonal changes.

Cost-Effectiveness

In terms of pricing, engineered wood typically sits in the middle ground between tile and conventional hardwood. Prices for engineered wood generally fluctuate between $3 and $10 per square foot, contingent on the material’s quality and the design you opt for. In contrast, you’ll likely spend anywhere from $5 to $15 per square foot for traditional hardwood flooring. 

Tile costs can be more variable, depending on factors like the type of material used and the intricacies of installation. As a result, engineered wood presents an economically viable alternative that still maintains a high level of visual appeal.

Easy Installation

Engineered wood flooring is generally easier to install than traditional hardwood. With methods like click-lock or tongue-and-groove systems, even homeowners with moderate DIY skills can undertake the installation. Of course, professional installation is always an option, but the DIY potential here provides additional cost savings and the satisfaction of completing a home improvement project yourself.

Aesthetic Appeal

Engineered wood provides a broad range of design options. Whether you’re aiming for a rustic oak appearance or the sophistication of dark cherry wood, there’s likely an engineered wood option for you. Additionally, the top layer can be sanded and refinished in many cases, offering the flexibility to change the look over time or to repair any minor damages.

Durability

Engineered wood floors are built to last. While the lifespan of your engineered wood flooring will depend on the top veneer’s thickness and the construction’s quality, you can generally expect them to last between 20 to 30 years. The top layer of higher-quality engineered wood can often be refinished, extending the floor’s lifespan further. However, it’s worth noting that you can only refinish engineered wood sometimes with solid hardwood due to the thinner top layer.

Drawbacks of Engineered Wood Flooring

While engineered wood flooring offers many advantages, it’s not without drawbacks. These are some points you’ll want to consider before making your decision:

Susceptibility to Scratches and Dents

Despite its sturdy construction, engineered wood is susceptible to scratches and dents. While the same can be said for hardwood floors, tiles generally fare better against heavy impact, making them a more durable option for areas with high foot traffic or the presence of pets.

Limited Refinishing Options

One of the appeals of hardwood flooring is that it can be sanded down and refinished multiple times over its lifespan. Engineered wood, however, has a thinner top layer of actual hardwood. This limits the number of times it can be refinished, which could be a concern if you plan to stay home for many years.

Sensitivity to Moisture

While engineered wood fares better against moisture than hardwood, it’s not entirely waterproof. Installing it in high-moisture areas like bathrooms or laundry rooms is not recommended. In contrast, tile flooring can be an excellent option for these areas.

Cost Compared to Other Alternatives

Though engineered wood is generally less expensive than hardwood, it is pricier than other alternatives like laminate or vinyl. If budget is a significant concern, consider exploring these other options.

Engineered Wood vs tiles

Engineered Wood vs. Tile Flooring

Maintenance

Both engineered wood and tile are relatively easy to clean and maintain. Regular sweeping and occasional mopping will keep engineered wood looking fresh, while tile can be cleaned with various household products. However, grout lines in tile flooring can sometimes complicate cleaning efforts.

Comfort and Insulation

Engineered wood offers a softer, warmer surface underfoot compared to tile. This can be especially comforting in bedrooms or living rooms where you may walk barefoot. In colder climates, engineered wood also provides better insulation than tile.

Style and Décor Compatibility

Engineered wood generally offers a warm, natural look that can fit into a wide range of décor styles, from rustic to modern. Tile offers more pattern and colour variety but tends to offer a cooler, more formal appearance. Your choice will depend on the atmosphere you wish to create in your space.

Engineered wood flooring indeed lives up to the promise of offering the best of both worlds in many respects. Its versatility, cost-effectiveness, ease of installation, aesthetic appeal, and relative durability make it a compelling choice for those in the hardwood-versus-tile debate. However, it comes with drawbacks, such as susceptibility to damage and limited refinishing options, which potential buyers should consider.

In weighing the pros and cons, engineered wood emerges as a strong contender that suits various needs and tastes. If you’re looking for a flooring option that combines the warmth and elegance of hardwood with some of the durability aspects of tile, engineered wood might be the perfect fit for your home.

The Art of Tile Arrangement: Creative Layout Ideas for Any Space

The phrase “the devil is in the details” couldn’t be more accurate regarding interior design. Every aspect of your decor plays an essential role in defining the character of your space, but the unsung heroes of the aesthetic world are undoubtedly the tiles. Tile arrangement isn’t just about picking the right colour or size—it’s a creative platform with limitless possibilities, ready to transcend the confines of conventional tiling methods. Let’s delve into the art of tile arrangement and explore creative layout ideas that can transform any space.

The Classic Subway

Let’s start with a classic, which is always a good place to find inspiration—the Subway tile layout. Named after its debut in New York City subway stations, this timeless pattern has a simple, clean look. Its versatility allows it to fit into any room, including the kitchen, bathroom, or living room. But who says we can’t reinvent the classics? Try using different colours to create a contrasting grout line, or lay them vertically for a modern twist.

Tile Arrangement

The Dynamic Herringbone

Now, if you’re up for more dynamism, the Herringbone pattern could be just the thing. This V-shaped weaving pattern brings a sense of movement to your space and is an excellent accent feature. It’s not restricted to floors alone—imagine a herringbone splashback in your kitchen or a striking feature wall in your living room!

The Geometric Hexagon

Enter the world of geometry with hexagon tiles. They are ideal for those who appreciate symmetry and order yet crave uniqueness. Experiment with different colours and shades within the same hexagonal layout to create a quilt-like pattern, or consider using large hexagonal tiles for a modern, minimalistic vibe.

The Checkerboard Charm

Checkerboard tiling always stays in style. Its bold, contrasting squares make a strong visual impact and work particularly well in larger spaces. The usual black-and-white combination is a classic, but don’t let that limit your creativity. Try playing with unconventional colours for a modern interpretation, or mix matte and glossy tiles of the same colour to add texture.

The Eclectic Mosaic

Mosaics are a perfect opportunity to get creative and express your unique style. They allow you to experiment with different shapes, sizes, and colours. This diversity creates a visually appealing, vibrant space full of personality. Ideal for bathrooms or as a feature wall, mosaic layouts can turn any room into a work of art.

The Elegant Chevron

The Chevron layout is a slightly modified version of the herringbone, but instead of meeting at a point, the tiles’ ends are cut at an angle to create a continuous zigzag design. The seamless nature of the chevron pattern imparts an understated elegance and a sense of movement. It’s perfect for those wanting a touch of sophistication without overwhelming the space.

The Terrific Tessellation

Tessellation refers to a collection of shapes closely fitted together in a repeated pattern without gaps or overlaps. You can use this concept with various tile shapes—triangles, squares, hexagons, and more. The resulting eye-catching layout brings your space an intriguing, almost mathematical elegance.

The Versatile Basketweave

The Basketweave layout combines horizontal and vertical tiles that mimic the look of woven strands. The result is a textured, three-dimensional effect that adds depth and character to any room. Play with different tile colours to amplify the woven effect, or opt for monochromatic tiles for a subtle and refined look.

Tile Arrangement

The Whimsical Windmill

The Windmill pattern is a delightful surprise in the world of tile arrangement. It involves four rectangular tiles surrounding a square tile, creating a windmill-like appearance. This charming pattern adds an element of playfulness to your space, perfect for family homes or anyone looking for a youthful, energetic aesthetic.

Remember, the beauty of tile arrangement is in its adaptability. These patterns are just a starting point—you can play with colour, size, texture, and orientation to suit your taste. Whether you’re designing a cozy cottage kitchen or a sleek, contemporary bathroom, tile arrangement is a powerful tool in your design toolkit. Let your imagination roam and transform these ceramic squares into a canvas that reflects your individual style.

The key to mastering the art of tile arrangement is not to fear creativity. Experiment with different layouts, and remember: there are no fixed rules. After all, your space is an extension of you—why not make it as unique as you are?

A Guide to Tile Waterproofing Methods: Choosing the Right Solution for Your Project

When planning a tile installation in your bathroom, kitchen, or outdoors, it’s critical to consider waterproofing. Without the correct waterproofing measures, moisture can penetrate beneath the tile, leading to serious issues like mould growth and structural damage. Thankfully, numerous tile waterproofing methods are available to ensure your project’s longevity and aesthetic appeal. 

This guide introduces these methods, highlighting their application process, pros and cons, and suitability for different tile installations.

1. Waterproofing Membranes

A popular choice for many homeowners and contractors, waterproofing membranes are thin layers of waterproof material applied underneath the tiles. This method can be categorized into two main types: liquid and sheet membranes.

Tile Waterproofing

Liquid Waterproofing Membranes are a ‘paint-on’ waterproofing system consisting of a liquid applied using a roller or brush. Once it dries, it forms a rubberized and waterproof barrier, preventing water from seeping beneath the tiles.

The main advantages of liquid waterproofing membranes are their ease of application, especially in complex areas like corners and around plumbing fixtures. However, they require a meticulous application process to ensure complete and even coverage, and it might take longer to dry, delaying the tile installation process.

Sheet Waterproofing Membranes: These are sheets of waterproof material that are adhered to the surface to be tiled. They offer reliable and robust protection against water infiltration.

The pros of sheet membranes include the consistency of thickness, which ensures reliable waterproofing across the entire surface. 

On the downside, they can be trickier to install, especially around intricate areas, and they may also require more labour and time compared to liquid membranes.

2. Epoxy Grouts

Unlike traditional cement-based grout, epoxy grout is a durable, waterproof, and stain-resistant material that fills the spaces between tiles. It’s composed of epoxy resins and fillers, which gives it superior water-resistant properties.

Epoxy grouts are excellent for areas constantly exposed to water, such as showers, as they require no additional sealing. Their stain resistance also makes them ideal for kitchen backsplashes and counters. However, epoxy grout’s application is more labour-intensive and time-consuming than traditional grout. It’s also more expensive but compensates for the cost with its longevity and minimal maintenance needs.

3. Tile Sealants

Tile sealants are applied to the tile surface and grout lines after installation. These are particularly beneficial for porous natural stone tiles and more susceptible to water damage.

There are two types of tile sealants: penetrating and topical. 

Penetrating sealants seep into the tile’s pores, protecting it without altering its appearance. Topical sealants form a protective coating on the tile surface. While they offer excellent water resistance, they may alter the tile’s look and feel.

The application process for tile sealants is relatively straightforward, typically involving a brush or spray. However, they require reapplication over time, depending on the sealant type and the area’s usage.

4. Surface Coatings

Surface coatings, or surface sealers, provide a protective layer on top of the tile and grout, preventing water penetration. They’re commonly used on outdoor tiles or areas with heavy traffic, as they also enhance resistance to wear and tear.

Surface coatings can add a glossy or matte finish to your tiles, enhancing their appearance. However, they can make the tile surface slippery, especially when wet. Like tile sealants, surface coatings must reappear over time to maintain their effectiveness.

Choosing the Right Waterproofing Method

Selecting the right waterproofing solution for your project depends on the type of tile you’re using, the tiled area, and your budget. Here’s a quick summary:

  • Waterproofing membranes (liquid or sheet) are great for bathrooms, showers, and other wet areas. They’re also recommended for large surface areas.
  • Epoxy grouts work well in places consistently exposed to water and staining, like showers and kitchen backsplashes.
  • Tile sealants are suitable for porous tiles, such as natural stone, in indoor and outdoor settings.
  • Surface coatings are excellent for outdoor tiles or high-traffic areas, offering waterproofing and enhanced wear resistance.

Remember that these methods can also be combined for optimal waterproofing. For example, a waterproofing membrane can be used with epoxy grout and a tile sealant for comprehensive protection in a shower.

Tile Waterproofing

To ensure the best outcome, consider hiring a professional, especially for more complex projects. Not only will a professional installer have the right tools and skills, but they’ll also provide valuable advice on the most appropriate waterproofing strategy for your specific needs. Visit www.prowaterproofinggoldcoast.com.au/ to learn more.

Primarily, a professional installer comes equipped with the necessary tools and possesses the requisite skill set. They have an in-depth understanding of how to efficiently and effectively apply these waterproofing measures, ensuring a seamless and long-lasting result. Their experience and expertise also mean they’re well-versed in addressing potential challenges or complications that may arise during the project.

Moreover, a professional can offer valuable advice tailored to your specific needs. They’ll assess the situation, understand your requirements and recommend the most suitable waterproofing strategy. This includes selecting the best materials, identifying the most vulnerable areas that need protection, and devising a maintenance plan to prolong the life of your waterproofing system.

Hence, while you can certainly perform some waterproofing measures on your own, for comprehensive protection and peace of mind, enlisting professional help is a worthy consideration.

How to Plan Bathroom Renovations on a Budget

One of the most common tasks for a bathroom renovations Brisbane professional is the design. If you are considering a makeover, you should first identify what you like about your current space and what you don’t. Next, decide whether a makeover will do the trick or if you simply want a cosmetic update. Once you’ve figured out which of the many bathroom styles you prefer, you can work towards a final decision.

bathroom renovations

Depending on the size of your project, renovations can take days. If you don’t want to live without a working bathroom, you can opt for a partial makeover. This is a great way to give your home a facelift, pass a building inspection, and improve the aesthetics. It’s important to consider how much time you can devote to the process, as bathroom makeovers are not for the faint of heart. Also, you should assess your physical capabilities and determine if you’re up for a full project. Regardless of how much time you have to invest, you’ll be glad you did.

Planning

Having the right planning is essential for a successful bathroom renovation. Even though most projects last for a few days, you should consider the time required to complete the project, the materials needed, and the number of people you’ll need to help you. 

If you’re a first-time renovator, you’ll want to make sure that you have all the necessary help. It’s also important to consider the type of makeover you want to undertake. If you want to replace an entire bathroom with a brand new one, you’ll need to knock down the old one. This is a huge undertaking, so you should determine whether you’re physically capable of doing the work yourself.

First of all, you should consider the time commitment you’re prepared to dedicate to the project. Do you have the time to complete the project on your own, or will you need help from a professional? Besides, you should also consider how much experience you have and what kind of skills you’ll need. If you’re doing the renovation on your own, make sure you’re physically fit for the job. A complete bathroom renovation is a physical workout, so you’ll need to be careful.

Budget

Before you start your bathroom renovation, it’s important to consider how much money you’re prepared to spend. The cost of tile removal is often the largest expense of a makeover, so it’s wise to hire a professional who’s experienced in this field. Once the renovation is complete, you’ll be able to move in with your new bathroom and enjoy the results. If you’re planning to remodel your bathroom, make sure to hire a reliable contractor for the job.

bathroom renovations

A bathroom makeover is not a small project, and it’s important to consider the budget you’ve allotted for the project. You need to consider your preferences and what your budget will allow. There are many options for the budget. By keeping these in mind, you can create a more affordable plan for the project. This will also help you focus on the details and features you need. If you’re not able to afford it, then choose a bathroom that is within your price range.

When planning a makeover, it’s important to know the cost of the project. A professional will be able to give you an accurate quote based on the size of your bathroom and the materials that are needed. You’ll need to order new fixtures and pay for them in advance. The contractor will draw up blueprints for your new bathroom. They can help you choose the best style for your needs. The best remodelling can add value to your property.

How to Choose Tiles for Your Home?

Wall tiles are widely used in different parts of America and their popularity is growing day by day. People love to have wall tiles in their bathrooms and kitchens. This is because wall tiles can give a beautiful look to your home and they are not very expensive. Apart from this, homeowners can also reduce the cost of heating their home by just installing wall tiles on their walls. Now let’s learn how can wall tiles be reused and recycled after they have been installed in a house.

Installation

To install wall tiles in the right way, first one must learn few basic techniques about this job: how to cut tile, how to place the wall tiles in the right pattern, how to secure tile adhesive correctly and how to lay new ceramic tiles properly. Thus, you need to pay special attention to all the above factors before tiling a bathroom for yourself and check out all relevant articles about ceramic tile. It would also help if you can use a gas mask when working on high-temperature tiles or ceramic tiles with high heat content. There can be many reasons for having a faulty installation. Improper installation can result in warped tiles that may not be flat and also there can be some cracked tiles.

The first step is cleaning the wall properly. For this, you can take out all the trash bags that are big enough. Then you need to wipe the entire surface of the wall with a rag and if the dirt does not get absorbed into the rug then you can take out the trash bags and throw them away. You can place a metal mesh over the surfaces so that any dirt particles cannot fall inside it and stain the wall tiles.

After ragging the surface you can apply the grout. For this, you need to choose water-based adhesive and grout will last longer. You can even go in for an epoxy-based grout but it can be expensive and it can crack too easily. Thus, the water-based adhesive is better as it is easier to work with, works better and is less expensive.

wall tiles

Next, you can put grout on the areas that have been scratched. If there is any gouge you can fill the gouge with more grout or you can take out and replace the damaged part of the tile with some plastic drop cloth. This is done so that the area looks smooth. If there is any wallpaper on the damaged region then you can remove it and replace it with a new piece of wallpaper.

Tile Options

When it comes to putting up ceramic wall tiles then you will have a lot of options. You can go in for travertine, ceramic or vitrified tiles depending on your taste and budget. You can also opt for wallpapers. However, it is recommended that you do not go in for such options until and unless you are confident about doing so. It is not only because they can be very expensive but it can also be very difficult to clean and maintain them.

Other than these there are many other options as well. You can opt for any option as long as it looks good. Wallpapers can also give a new appearance to your walls but not all wall tiles are suitable for this purpose. Some of them can even damage your walls and can even cause a lot of trouble. On the other hand, some other options can also be used for decorating your wall and thus they should be carefully studied and evaluated before their use.

To get the best from your wall tiles then you can hire a professional company. These companies have professionals who know how to install and work with various wall tiles. They can also ensure that the job gets done right. You can always get in touch with such companies and can decide on getting their services for beautifying your walls.

Porcelain Tiles Advantages Over Other Flooring Materials

When porcelain tiles are installed, no matter where they are placed, they will create a timeless beauty that will last for a very long time. However, porcelain tiles have their disadvantages as well. If you are planning to get porcelain tiles for your home or office, porcelain tiles vs ceramic tiles are an important issue for you to consider. This article will discuss porcelain tiles advantages and disadvantages. You will also learn how porcelain tiles can be repaired and restored to match your existing flooring.

Advantages 

One of the most important advantages of porcelain tiles over ceramic flooring is an easy and quick installation process. The natural elegance and simplicity of porcelain tiles, coupled with unbelievable resilience and flexibility, have already attracted the attention of several modern interior designers worldwide. Porcelain tile flooring, in particular, has become a highly prominent feature in several contemporary homes all around the world. It provides a great aesthetic appeal and allows the homeowners to create a warm ambience in their home. Porcelain tiles are available in a wide range of designs, patterns and colours. They are very easy to install and maintain, making them one of the most popular flooring options today.

Yet another porcelain tiles advantage is their low maintenance and durability. Unlike other building materials, they are not vulnerable to wear and tear. Porcelain’s surface is resistant to stains, scratches and spills. As a result, you will not need to spend a lot of time cleaning them. Porcelain grout is also very easy to maintain. You can easily use cleaning agents such as muriatic acids to get rid of stubborn stains, dirt and mess from grout lines.

Porcelain tiles are extremely durable because porcelain tiles contain very little porcelain material and porcelain tiles are sealed together using high-quality materials that are resistant to moisture, stains and spills. Porcelain grout lines usually have a high degree of porcelain, so they are even more resistant to dirt and stains. A high-quality grout will resist moisture, so you don’t need to worry about your porcelain tiles getting damaged due to water or moisture seeping into the grout lines.

porcelain tiles

Another porcelain tiles advantage is its cost-effectiveness. Because porcelain tiles are made from natural materials, they are cheaper than other types of tiles made from man-made products. Porcelain is a low-maintenance, but still highly-resistant material. So, while it’s true that porcelain tiles are an expensive material, the long-run savings can be enormous when it comes to maintaining the beauty and value of your home.

Installation

If you want to install porcelain tiles in your bathroom, there are two ways to go about it: either using a system that involves laying down tile over a hard surface or by installing individual porcelain tiles on your own. With a system installation, you would first lay the base under the tiling area and secure it with silicone. Then you would roll out the grout joints using a system of brush rolls and apply them to the floors in thin, even layers. The entire process can take up to one hour, depending on the size of the room, the thickness of the grout and the number of tiles you have to install.

Installing porcelain tiles on your own is also a relatively easy process, but it does have some challenges. One of the main things to consider is the joint between the porcelain tiles themselves, which are made of mastic. If this joint becomes worn or damaged somehow, the entire floor may have to be replaced.

To summarize, porcelain tiles have several advantages over other flooring materials. They are durable, resistant to stains, easy to clean and maintain, and they can last for decades with proper care. On the downside, porcelain tiles do cost more than ceramic tile, but their benefits greatly outweigh their downside when it comes to long-term savings. In short, if you have a large room that you need to cover, porcelain tiles may be the best choice for you.

Types of Floor Tiles

When looking for an ideal form of floor covering, floor tiles have huge benefits over all other floor covering options and offer long-lasting beauty, performance, and durability. As such, floor tiles are now no longer limited to wet areas like bathrooms. You can now find floor tiles in any room of your home and the options and designs are endless. Some are asking how on earth are floor tiles heat resistant. The answer is simple. This type of floor covering is so strong and waterproof that even a fall from a high shelf or even a fall from the stairs could not damage these types of tiles.

Waterproof and Heat Resistant

You may wonder why floor tiles are more waterproof than linoleum or carpets. Well, the answer lies in the construction of floor tile. Traditional floor tile is composed of linoleum or carpeting. Linoleum is comprised of a groundsheet, underlayment, bonded vinyl or paper, and bonded wood. The thickness of these materials makes it possible for water to spread more easily, especially if there are cracks or breaches in the subfloor.

Carpeting, on the other hand, is made of one woven sheet of fabric which is exposed to varying amounts of moisture. The fabric, when exposed to moisture, tends to expand and contract, thus making a rug more or less damp depending on its overall condition. To make matters worse, the expansion and contraction are also affected by the changes in temperature. So, over time, you will notice that your carpet gets hot and cold faster than linoleum or carpets. To top it off, since carpeting can be dyed, homeowners often get a wrong look when it comes to the colour of their floor tiles.

Ceramic Floor Tiles 

On the other hand, ceramic floor tiles are resistant to heat, stains, spills, and moisture. This means you can use them in any area that usually gets a lot of foot traffic, like the hallways, living rooms, or foyers. Aside from these obvious benefits, ceramic floor tiles are aesthetically appealing and they are affordable as well. You can find them at a fraction of the cost of linoleum or carpeting. As long as you keep in mind a few factors, such as the right construction, the right number of pieces, the right texture and colour, and the right design, you can be sure that you are getting a great investment that can last for many years.

floor tiles

Ceramic floor tiles are popular in kitchens, bathrooms, and basements. Their appealing looks, the ease of maintenance, and their durability make them a good choice for most homeowners. While kitchen and bathroom floor tiles are usually used in areas where food is prepared, ceramic floor tiles are also suitable for the bathroom. Ceramic floor tiles are becoming quite popular in bathrooms because they can add a subtle glamour and style to the room.

Choosing the Right Tiles

Homeowners usually get confused about choosing the right floor tiles for their homes. This is because there are so many different types of flooring available in the market today. To give you some examples, you can compare ceramic floor tiles to ceramic floor tiles, linoleum to vinyl flooring, wood to concrete flooring, and even cork to concrete floor tiles. Each of these floorings has its advantages, and some disadvantages, too. You need to know these things so that you can determine which one is best for you. Here are some of the different types of flooring you can choose from:

Marble is one of the most popular options homeowners have because of its beautiful appearance. Because of its appeal, it has been used for hundreds of years to line floors and walls. Today, marble is still widely used in interior and exterior decorations, though more people are getting attracted to its natural stone look. Natural stone floorings are also great options because they are durable and can withstand different kinds of climates. However, you need to make sure that the floor you are installing is made of real marble because reproductions can be easily spotted.

Another choice you have is granite tiles. These are much harder than marble tiles, but they are also more durable. The good thing about granite tiles is that you can install them in smaller areas compared to larger floorings such as marble tiles. Granite floorings are also great because they are available in different shades and colours. If you want flooring with subtle tones, then granite may be the perfect option for you. On the other hand, if you are planning on having some foot traffic in your home, then marble tiles are the ideal choice.

Tile Installers – Ideal Platform For New Tile Floor Installation

Installing tiling can be one of the most exciting and rewarding parts of any property improvement job. Often tiling installation will involve the involvement of an experienced professional tiler. A tiling installation guide can help the do-it-yourself tiling expert get up to speed on the basics of tiling installation. This information is vital if you want to enjoy a professional-looking finish without the added expense of professional labour. But even the most skilled tiler will have areas where he or she will cut corners and save time with an inferior tiling installation.

Movement Joints

Movement joints are an integral part of the tiling installation because they add strength to the tiles. Many homeowners look to tiling installation contractors to install movement joints between their ceramic tiles and concrete floors. The addition of movement joints to a tiling installation is often something that should be included at the initial design stage by your tile contractor or architect. But it’s still helpful to have at least a basic knowledge of why and when movement joints should be used where.

Movement joints provide an attractive means of creating different sized planks for your floor and also make it easier to replace damaged tiles when they wear out. Even the most expensive quality tiles will be less than $10 per square foot, making the cost of a tiling installation relatively cheap when compared to other home improvement projects. This is important because tile flooring installation cost can easily add up over time when you’re re-doing a section of your floor or adding on new rooms.

tiling installation

So is a movement joint worth the cost to you? When talking about tiling installation cost, several factors should influence your decision. The first factor is how much space you’re planning to cover with the tiling installation. If you’re only tiling a small area then the cost of a tiling installation may not be a major factor in your choice of tiling, but if you’re tiling a larger area then it’s highly recommended that you use movement joints so that you don’t have to backtrack over every bit of tiling.

Hiring a Contractor

Another important factor which will influence your tiling installation choice is whether you want to use professional tile contractors to do the work for you. Although you will be required to purchase tile cutting equipment from a supplier, it’s recommended that you employ a few professional tile contractors to do the job. This way you’re guaranteed to get a professional finish which is a far cry from doing it yourself. Furthermore, hiring professionals will mean that you know that the job has been completed correctly and up to standard. Nothing can be more disappointing than tiling your bathroom and discovering that it’s stained, peeling or splitting – this is a sure-fire way to throw your new tiling installation into disarray.

You’ll likely require tiling installation with joint installations. Movement joints are the fixtures that connect tiling floors to walls and other structures. There are two types of movement joint available; fixed movement joints and removable movement joints. Fixed movement joints are those which are attached to one side of the tiling and slide out and attached to another structure on the other side.

Outside 

Moving on to tiling installations on the outside of your home, we have the possibility of using either ceramic tiles or natural stone. It’s highly recommended that you employ ceramic tiles for your outside tiling installation projects as they provide a highly durable and hard-wearing surface. Moreover, some several designs and materials can be utilised to manufacture ceramic tiles. Tiles made from ceramic tiles are very easy to maintain and should last for many years. In terms of selecting your tiling installation materials, it’s recommended that you opt for natural stone material as they are highly attractive and tough.

There are many reasons why you might require tiling installation services in London. Perhaps you want to add a new tile floor in your bathroom or kitchen area. If this is the case, you will need to tile installation service from qualified tile installers. A professional installer will be able to design a tiling installation plan with the required specifications to ensure that your new tile floor is installed properly. Furthermore, he/she will also be in a position to advise you about any minor issues or repairs which may have to be carried out during the initial stage of the tiling installation process.